
WordPress website banane ke liye step-by-step guide. Is beginner’s guide mein sekhe WordPress installation, customization, SEO optimization, aur website maintenance ka tareka.
Hi मेरा नाम Rakesh kumar lenka है आप इस Article को completely पड़े WordPress Website कैसे बनाना है आपको सारी डिटेल्स मिल जाएंगे Article पढ़ने के बाद मुझे बताएं Comment Section में क्या Article कैसे लगा आपको कुछ समझ आया या नहीं please मुझे कमेंट करके बताइएगा |
WordPress Kya Hai?
आज के डिजिटल दुनिया में अपनी Website बनाना हर व्यक्ति और Business के लिए जरूरी हो गया है अगर आप बिना कोडिंग के अपनी वेबसाइट बनाना चाहते हैं तो WordPress आपके लिए सबसे बेहतरीन टूल है ।
WordPress एक Content Management System (CMS) है जो आपको आसानी से Professional Website डिजाइन करने और मैनेज करने की सुविधा देता है।
WordPress ka Overview
WordPress एक Open Source Platform है जो दुनिया के 40% से ज्यादा Website इसी में बने हुए हैं यानी की हर छोटी बड़ी website wordpress पर बनी होती है ।इसका मतलब है कि यह सिर्फ Beginners ही नहीं बल्कि बड़े-बड़े Developer और agencies भी WordPress का use करते हैं।
Key Features of WordPress
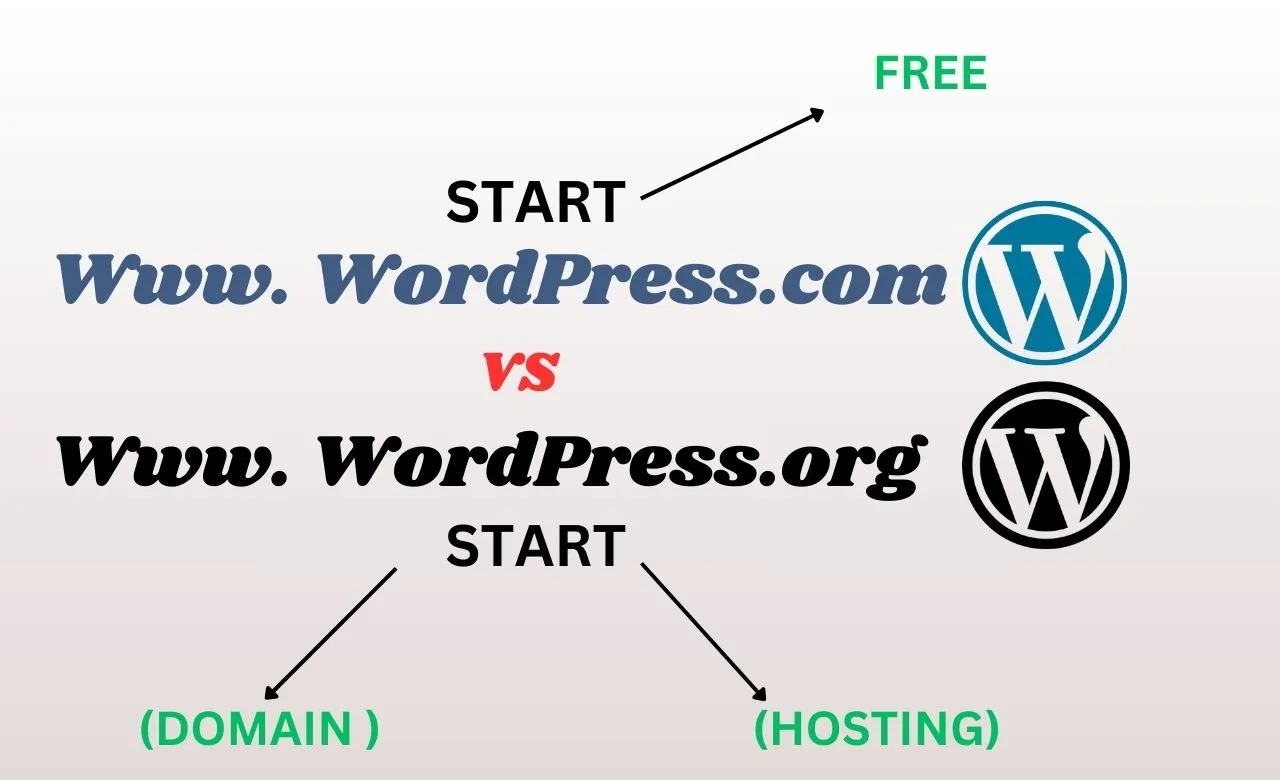
WordPress.com aur WordPress.org me Antar
WordPress दो प्रकार के हैं – WordPress.com aur WordPress.org. दोनों का use Website बनाने के लिए ही होता है लेकिन दोनों में बहुत अंतर होता है ।
|
Visheshata |
WordPress.com |
WordPress.org |
|---|---|---|
|
Hosting |
Automattic dwara host kiya jata hai |
Aapko khud hosting kharidni hoti hai |
|
Cost |
Free plan available, lekin paid upgrades |
Puri tarah free, sirf hosting aur domain ka kharcha |
|
Customization |
Limited themes aur plugins allowed |
Unlimited themes aur plugins ka support |
|
Control |
Restricted access aur control |
Puri tarah se aapka control hota hai |
|
Ads aur Monetization |
Free plan par ads dikhte hain. |
Aap apne hisab se ads laga sakte hain |
|
Use Case |
Blogging aur chhoti websites ke liye. |
Business, eCommerce aur large projects ke liye |
Kaunsa chune ?
- WordPress.com उन लोगों के लिए सही है जो सिर्फ ब्लॉगिंग शुरू करना चाहते हैं बिना किसी परेशानी के।
- WordPress.org . उन लोगों के लिए बेस्ट है जो अपनी वेबसाइट पर पूरा Control चाहते हैं और अपने हिसाब से डिजाइन और functionality customize करना चाहते हैं।
अगर आपको एक professional aur scalable Website बनानी है तो WordPress.org सबसे बेहतरीन विकल्प है।
WordPress Website Banane ke Liye Jaroori Cheezein
अगर आप अपनी खुद की WordPress website create करना चाहते हैं तो कुछ ऐसा चीजों की आवश्यक है जो बिना किसी रूकावट के आपकी साइट को लॉन्च करने में मदद करते हैं यहां हम उसे सभी चीजों का जिक्र करेंगे जो एक Beginner के लिए जरूरी है।
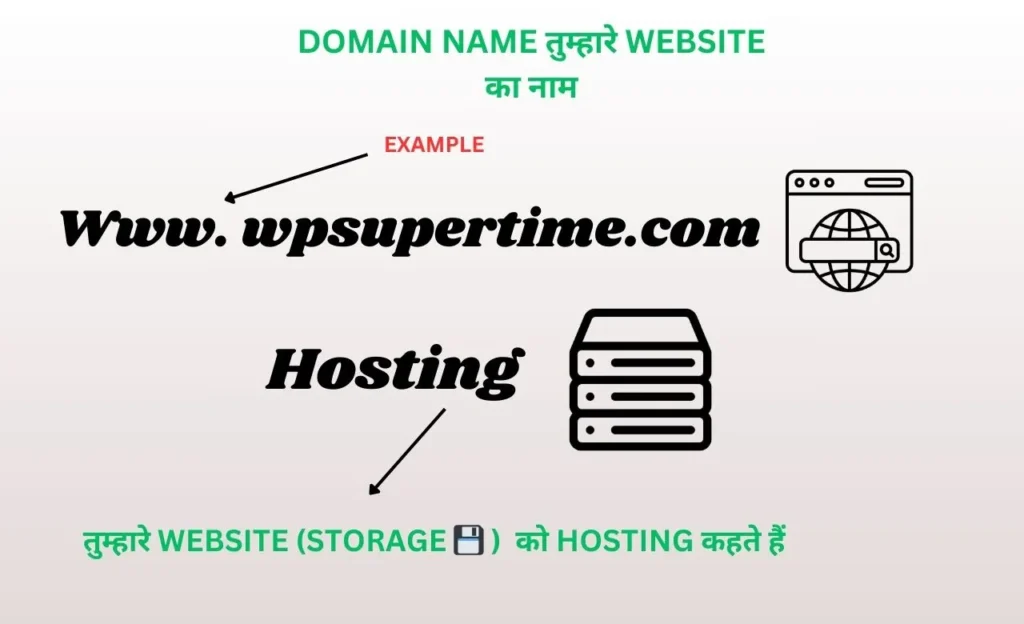
1. Domain Name Kya Hai aur Kaise Choose Kare?
Domain Name आपकी वेबसाइट का address होता है जो लोग web browser में टाइप करके आपकी साइट तक पहुंचाते हैं जैसे www.wpsupertime.com एक Domain है Domain नाम आपकी ऑनलाइन पहचान होती है इसीलिए सोच विचार करके choose करना चाहिए।
Domain Name Choose Karne ke Tips:
Domain Name Purchase Karne ke Popular Platforms
2. Web Hosting Kya Hai? (Best Hosting Providers ka Comparison)
Web Hosting एक ऐसी जगह है जहां आपकी वेबसाइट के सभी फाइल और डाटा स्टोर किया जाता है यह एक server होता है जो 24/7 Online रहता है और जब कोई आपकी साइट पर आता है तो यह Server उन्हें आपकी वेबसाइट दिखता है।
Types of Web Hosting:
Best Web Hosting Providers ka Comparison (2025)
|
Provider |
Speed |
Pricing (Per Month) |
Support |
Best For |
|---|---|---|---|---|
|
Fast |
₹169 se shuru |
24/7 Support |
Beginners aur Bloggers |
|
|
Very Fast |
₹149 se shuru |
24/7 Support |
Affordable aur Reliable |
|
|
Excellent |
₹300 se shuru |
24/7 Support |
Speed aur Security |
|
|
Very Fast |
₹280 se shuru |
24/7 Support |
Developers aur Speed Lovers |
|
|
Fast |
₹199 se shuru |
24/7 Support |
Beginners aur Businesses |
3. SSL Certificate aur Uski Zaroorat
SSL (Secure Sockets Layer) एक security protocol है जो आपकी Website और यूजर के बीच के data को encrypt करता है जब आपकी साइट पर SSL होता है तो आपके domain के https:// और एक ग्रीन Lock आगे दिखाई देता है जो विजिटर को बताता है की साइड secur है।
SSL Certificate Kyun Jaroori Hai?
- SEO Benefits: Google aisi websites ko prefer karta hai jo SSL enabled hoti hain.
- Trust aur Security: Users zyada vishwas karte hain jab unhe lagta hai ki unki information safe hai.
- Data Protection: Ye hacking aur data chori hone se bachata hai.
Free aur Paid SSL Certificate Providers
- Free: Let’s Encrypt, ZeroSSL
- Paid: GoDaddy, Comodo, DigiCert
Pro Tip: कोई hosting providers free SSL certificate देता है जब आप उनके साथ Hosting Purchase करते हैं जैसे ,Bluehost, और SiteGround, Hostinger.
आपकी wordpress website के लिए Domain, Hosting ,और SSL सबसे जरूरी हिस्सा है इनके बिना साइड live नहीं हो सकती इसीलिए इन चीजों का सही चुनाव करना जरूरी है।
WordPress Installation – Step by Step Process
एक बार जब domain name, web hosting aur SSL चुनाव कर लिया तब अगले कम होता है WordPress install करना WordPress installation काफी आसान होता है ।
और आजकल एक hosting providers एक one-click install ऑप्शन देता है जो beginners के लिए बहुत मददगार होता है यहां पर हम CPanel से manual installation और one-click installation का पूरा प्रोसेस समझते हैं।
1. Hosting ke CPanel se WordPress Install Karna
CPanel एक web hosting control पैनल है जो आपको अपनी website और server को मैनेज करने की सुविधा देता है हो WordPress manually install करना उन लोगों के लिए यूज़फुल होता है जो थोड़ा टेक्निकल कंट्रोल चाहते हैं या अपने installation को customize करना चाहते हैं।
Step-by-Step Process:
- CPanel Login Kare:
- Apni hosting provider site par jayein aur CPanel login kare.
- Aapko hosting ke welcome email me CPanel ka link aur login details milengi
- File Manager me Jaye:
- CPanel me “File Manager” option ko open kare.
- Public_html folder me jayein, yahi par aapki website ki files store hongi.
- WordPress Download Kare:
- WordPress ki official website (wordpress.org) se latest version download kare.
- Downloaded ZIP file ko File Manager me upload karein aur extract kare.
- Database Create Kare:
- CPanel me “MySQL Databases” option par click karein.
- Ek naya database banayein aur uske liye username aur password set kare.
- Ye credentials WordPress installation ke dauraan chahiye hote hain
- Install Script Chalaye:
- Apne domain par jayein (for example: www.yourwebsite.com).
- WordPress setup screen dikhai degi.
- Language select karein aur “Let’s Go” par click kare
- Database name, username aur password fill kare.
- Site Details Enter Kare:
- Site ka title, admin username, password aur email daale.
- Install WordPress” par click kare.
- Login Kare:
- Installation ke baad www.yourwebsite.com/wp-admin par jayein aur apne credentials se login kare.
- Ab aapka WordPress dashboard ready hai.
read more Article
2. One-Click WordPress Installation ka Tarika
आज एक hosting providers beginners के लिए one-click WordPress install का option देता है यह तरीका सबसे तेजी से काम करता है और टाइम बचाता है।
Step-by-Step Process
- Hosting Account me Login Kare:
- Apni hosting provider site par login karein.
- Bluehost, Hostinger, SiteGround, aur HostGator jaise providers ye feature dete hain.
- CPanel ya Dashboard me Jaye:
- “Auto Installer” ya “Softaculous” ko open kare.
- Softaculous ek tool hai jo WordPress ke alawa aur bhi bahut saari apps install karne ka option deta hai.
- WordPress Icon Select Kare:
- One-click installer me WordPress ka icon dekhein aur uspe click karein.
- Install Button Par Click Kare:
- “Install Now” button dikhai dega, uspe click kare.
- Apni site ke liye domain select karein (jo aapne pehle register kiya hai)
- Agar site pehle se live nahi hai to “www.yourwebsite.com” select kare.
- Website Ka Naam aur Details Daale:
- Site ka naam aur description fill kare.
- Admin username aur password set kare.
- Install Process Complete Kare:
- Installation process 2-5 minute me complete hoti hai.
- Process complete hone ke baad aapko WordPress admin panel ka link milega.
- Login Kare:
- www.yourwebsite.com/wp-admin par jayein aur apne credentials ka upyog karke login karein.
Kya One-Click Installation Best Hai?
हां One-click installation सबसे तेजी से WordPress website create करने का तरीका है और इसे टेक्निकल चीज हैंडल करने की जरूरत नहीं होती Beginners के लिए यह सबसे आसान और recommended process है।
Pro Tip:
- Managed WordPress Hosting लेते समय देखिए की Hosting Provider Automatic Updates और Backup का Option देता है या नहीं यह आपकी साइट की Security और Performance के लिए जरूरी होता है
Dashboard ka Introduction
जब आप www.yourwebsite.com/wp-admin पर login करते हैं तब आपको WordPress Dashboard दिखाई देता है यहां से आप अपनी वेबसाइट का पूरा कंट्रोल ले सकते हैं डैशबोर्ड का लेआउट सिंपल होता है और लेफ्ट साइड में एक नेविगेट मेनू होता है जो अलग-अलग sections तक ले जाता है
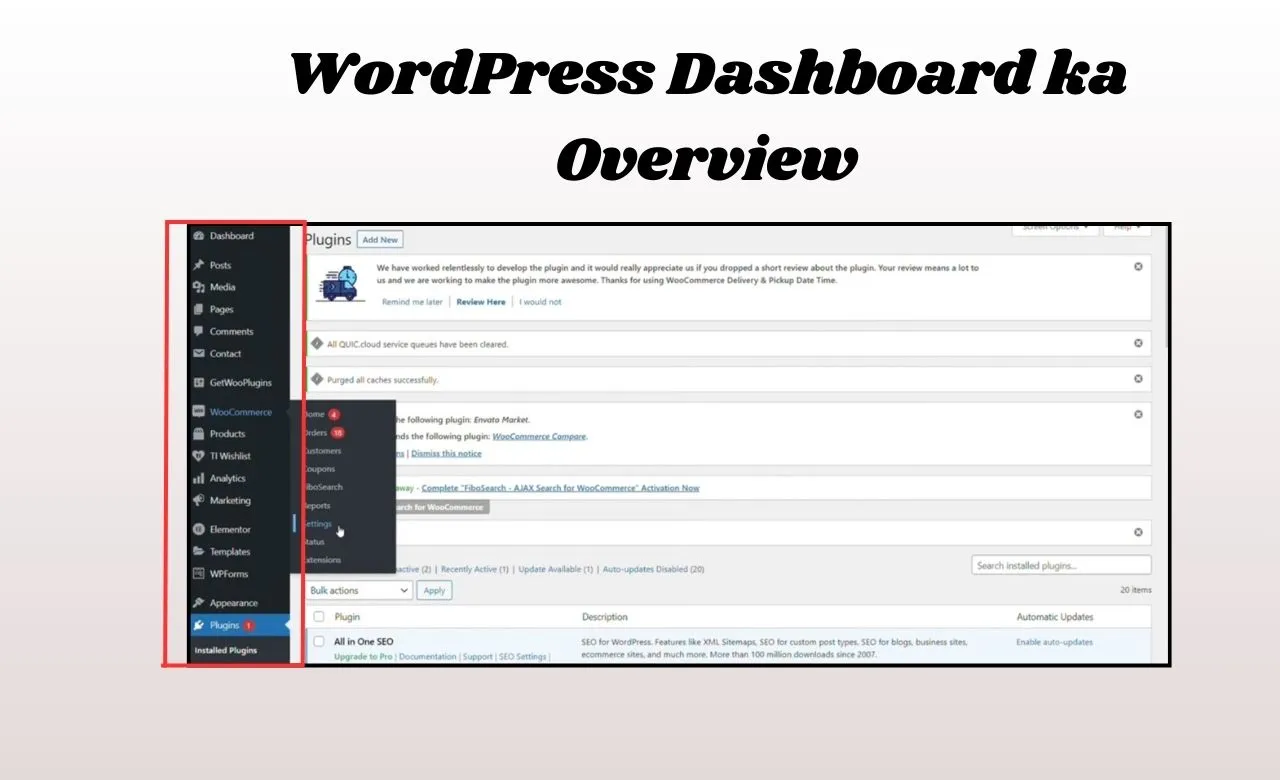
Important Sections:
Quick Actions:
Posts vs Pages – Antar aur Upyog
वर्डप्रेस में पोस्ट और पेज काफी मिलते-जुलते लगते हैं लेकिन दोनों का खूबियां अलग-अलग है ।
|
Posts |
Pages |
|
|---|---|---|---|
|
Nature |
Dynamic aur regularly update hote hain. |
Static aur rarely change hote hain. |
|
|
Example |
Blog posts, News, Articles. |
About Us, Contact, Privacy Policy. |
|
|
Categories aur Tags |
Categories aur Tags assign kiye ja sakte hain. |
Categories aur Tags nahi hote. |
|
|
Timeline Me Show |
Latest posts homepage par dikhte hain. |
Directly navigation bar me dikhte hain. |
|
|
Comments Option |
Posts par comments allow hote hain |
By default, pages par comments band hote hain. |
|
|
SEO Impact |
Posts zyada SEO value lete hain. |
Pages SEO ke liye secondary hote hain. |
Kab Kya Use Karein?
- Posts: Agar aapko regular blog likhna hai ya news update karni hai.
- Pages: Agar aapko permanent content create karna hai jaise “About” aur “Services”.
Themes, Plugins aur Settings ka Samajh
1. Themes – Website ka Design aur Layout
WordPress में Themes आपकी वेबसाइट का डिजाइन और लेआउट define करती है थीम काफी flexible होती है और आपकी वेबसाइट को look एक ही क्लिक में बदल सकता है।
Themes Install Karne ke Steps:
- Appearance > Themes me jayein.
- “Add New” par click karein.
- Free themes ke liye WordPress directory se choose karein ya premium themes upload kare.
- Theme install aur “Activate” kare.
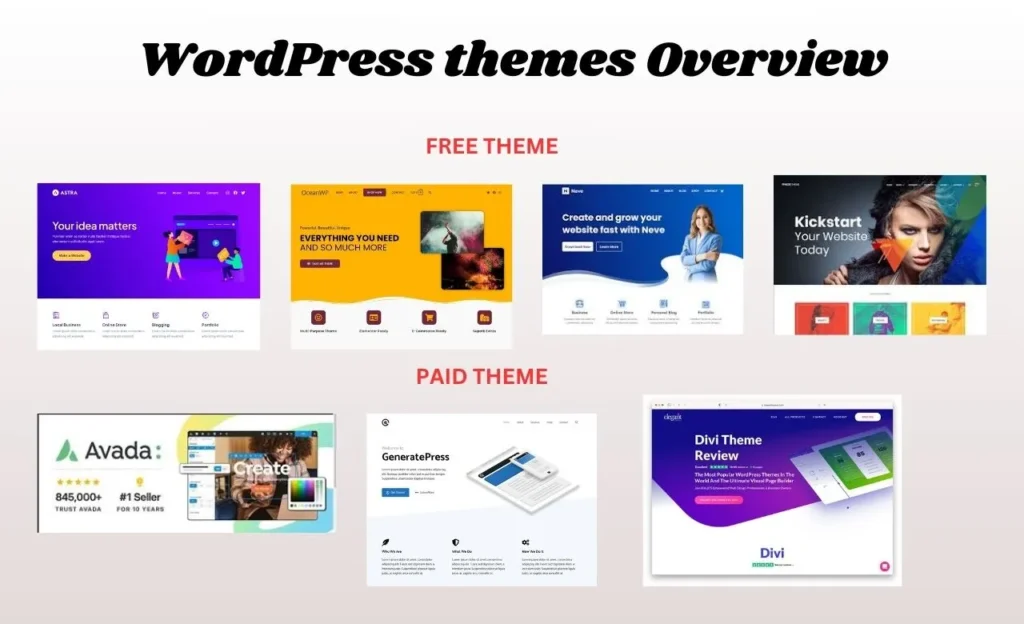
Popular Free aur Paid Themes:
- Free: Astra, OceanWP, Neve.
- Paid: Divi, GeneratePress, Avada.
2. Plugins – Website ke Features Badhayein
Plugins आपकी वेबसाइट में नया features और functionalities ऐड करते हैं बिना किसी कोडिंग के हर functionalities के लिए Plugin available होते हैं जैसे SEO, Security, Contact Form, और Backup इत्यादि के लिए।
Plugins Install Karne ke Steps:
- Plugins > Add New par jaye.
- Search bar me plugin ka naam type karein (jaise: Yoast SEO).
- “Install Now” par click karein aur phir “Activate” kare.
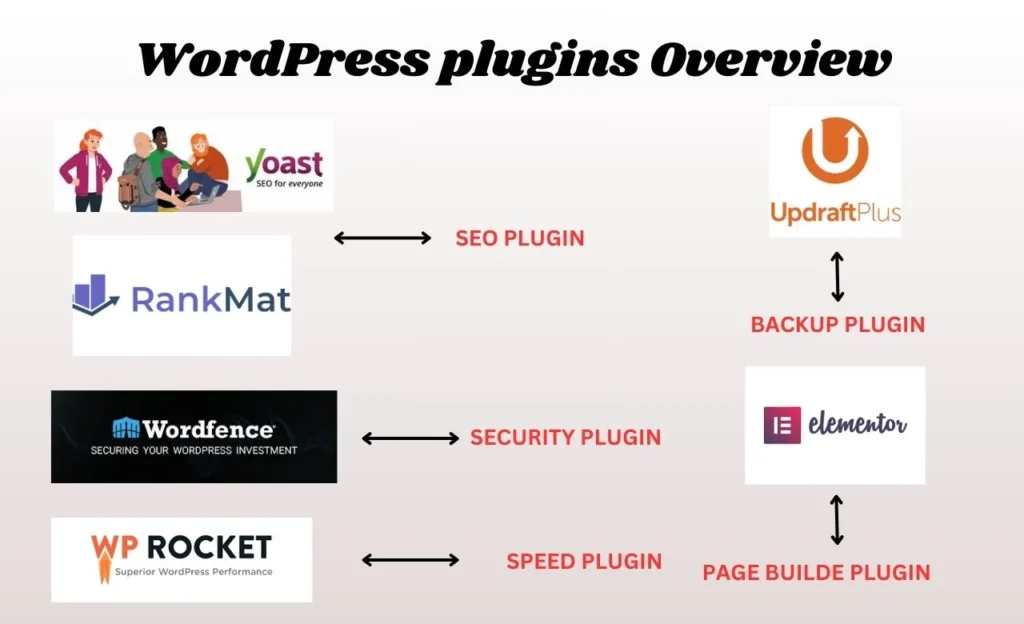
Must-Have Plugins:
- SEO: Rank Math ya Yoast SEO.
- Security: Wordfence ya Sucuri.
- Speed: WP Rocket ya LiteSpeed Cache.
- Backup: UpdraftPlus.
- Page Builder: Elementor.
3. Settings – Website ki Basic Configuration
Settings section में आप अपनी वेबसाइट का ओवरऑल बिहेवियर कंट्रोल करते हैं।
Key Settings:
Pro Tip:
SEO ke liye Permalinks ko hamesha “Post Name” par set karein taki URL clean aur readable ho.
Conclusion:
WordPress dashboard का समझना और use करना beginners के लिए पहला स्टेप होता है एक Successful Website create करने के लिए अगर आप इन फ्यूचर का सही use करते हैं तो आपकी वेबसाइट professional और SEO friendly बन सकती है।
1. Free aur Premium Theme Choose Karna
Free Themes:
- Free themes WordPress की ऑफिशियल repository में अवेलेबल होती है यह थीम बेसिक फ्यूचर देती है और beginners के लिए परफेक्ट होती है।
- Best Free Themes: Astra, OceanWP, Neve, Hestia, GeneratePress.
Pros:
- Zero Cost.
- Simple aur lightweight.
- Easy to Install.
Cons:
- Limited customization options.
- Basic features aur design
Premium Themes:
- Premium themes me ज्यादा फ्यूचर customization options और support मिलता है लेकिन डिजाइन ज्यादा attractive और responsive होता है।
- Best Premium Themes: Divi, Avada, GeneratePress Premium, Kadence Pro, Astra Pro.
Pros:
- Advanced features aur jada customization.
- Responsive aur SEO-friendly design.
- Regular updates aur dedicated support.
Cons:
- Costly hote hain (₹3,000 se ₹8,000 tak).
- Beginners ke liye thoda complex ho sakta hai..
Pro Tip: अगर आप सीरियस वेबसाइट बना रहे तो प्रीमियम theme में इन्वेस्ट करना बेहतर होता है।
Read more Article
2. Theme Installation aur Customization
A. Free Theme Install Karne ka Process:
- WordPress Dashboard me Login Kare :
- www.yourwebsite.com/wp-admin par jaye aur login kare.
- Appearance > Themes par Click Kare:
- Left side menu me Appearance par click kare aur fir Themes par jaye.
- Add New par Click Kare:
- Page ke top par “Add New” button dikhega, uspe click kare
- Theme Search Kare:
- Search bar me theme ka naam likhe (jaise: Astra).
- “Install” button par click kare.
- Activate Kare:
- Installation ke baad “Activate” button par click kare aur theme active ho jayegi.
B. Premium Theme Install Karne ka Process:
- Premium Theme Purchase Kare:
- Astra Pro, Divi ya Avada jaise themes ko unki official website se purchase kare.
- Download Theme ZIP File:
- Purchase ke baad theme ka ZIP file download kare.
- WordPress Dashboard me Upload Kare:
- Dashboard me Appearance > Themes > Add New par jaye.
- “Upload Theme” par click kare aur ZIP file upload kare
- Install aur Activate Kare:
- “Install Now” par click kare aur installation complete hone ke baad Activate kare.
3. Theme Customization ka Tarika
- Appearance > Customize par Jaye:
- Theme activate karne ke baad “Appearance > Customize” par click kare
- Aapko live preview ke sath customization ka option milega.
- Website ka Layout Badlein:
- Header, Footer, Sidebar aur Blog layout customize kare.
- Color aur Fonts Choose Kare:
- Branding ke hisaab se website ke liye colors aur fonts select kare
- Homepage Design Kare:
- Homepage ka design aur content customize kare. Agar theme ek demo site deti hai to use import kare aur apne hisaab se edit kare.
- Additional CSS Add Kare:
- Agar aapko aur zyada design changes chahiye to Additional CSS section me apna custom CSS add kare.
Best Practices:
- Mobile Friendly Theme Choose Kare: Zyada se zyada log mobile par site visit karte hain, isliye responsive theme ka use kare.
- Fast Loading Theme: Website speed SEO ke liye important hai. Lightweight aur optimized theme ka use kare.
- Regular Updates: Jo themes regular update hoti hain wahi use karein taki security aur compatibility ka koi issue na ho.
Conclusion:
एक अच्छी theme आपकी वेबसाइट का overall look और feel तय करती है Beginners के लिए free themes बेस्ट है जबकि Professional Website के लिए Premium theme ideal होती है टीम का सही चुनाव और कस्टमाइज आपकी साइट को attractive ,fast और SEO-friendly बनता है ।
Essential Plugins Jo Har Website ke Liye Jaroori Hain
WordPress को पावरफुल और feature-rich बनाने का सबसे बड़ा टूल है plugins, आप अपनी वेबसाइट मैं New Future ऐड कर सकते हैं बिना किसी कोडिंग के चाहे आपको Design,SEO Security या Backup काम करना हो WordPress के लिए हर काम का plugins available है।
1. Elementor (Website Design aur Page Building Plugin)
Elementor एक drag-and-drop page builder है जो आपके बिना कोडिंग के प्रोफेशनल web page design करने की सुविधा देता है यह beginners और perfect दोनों के लिए परफेक्ट है।
Key Features:
Setup Process:
- Dashboard > Plugins > Add New par jaye.
- Search bar me “Elementor” likhein aur install kare.
- Activate karne ke baad Pages > Add New par jaye aur “Edit with Elementor” ka option select kare.
- Drag-and-drop karke apna homepage aur landing page design kare.
Pro Tip: Elementor का Pro version और भी ज्यादा templates और widgets के साथ आता है ।
2. Rank Math (SEO Plugin)
Rank Math एक advanced SEO plugin है जो आपकी वेबसाइट को गूगल में रैंक करने में मदद करता है यह on-page SEO के लिए बेस्ट टूल है और beginners के लिए भी काफी आसान है।
Key Features:
Setup Process:
- Dashboard > Plugins > Add New me jayein aur “Rank Math” search kare.
- Install aur activate kare.
- Setup Wizard ko follow kare aur site ka SEO optimize kare.
- Focus keyword set kare aur posts aur pages ka SEO score improve kare.
Pro Tip: Rank Math का फ्री वर्जन की काफी powerful है लेकिन प्रो वर्जन और भी ज्यादा फ्यूचर प्रोवाइड करता है।
3. Yoast SEO (SEO Plugin ka Dusra Option)
अगर आपको Rank Math पसंद नहीं है तो Yoast SEO एक और बेस्ट ऑप्शन है यह भी SEO के लिए काफी popular, trusted plugin है।
Key Features:
Setup Process:
- Yoast SEO ko Plugins > Add New se install kare.
- Setup Wizard ko follow karein aur basic SEO settings configure kare.
- Post likhte waqt focus keyword aur readability check kare.
4. WP Rocket (Website Speed aur Caching Plugin)
Website की speed SEO हो और यूजर एक्सपीरियंस के लिए बहुत important है WP Rocket एक कैसी प्लगइन है जो आपकी वेबसाइट की लोडिंग स्पीड improve करता है।
Key Features:
Setup Process:
- WP Rocket ek premium plugin hai, ise official website se purchase kare.
- ZIP file download karein aur Plugins > Add New > Upload Plugin se upload kare.
- Activate karne ke baad caching automatic enable ho jata hai
Pro Tip: WP Rocket kaafi lightweight aur beginner-friendly hai.
5. Security aur Backup Plugins
A. Wordfence Security (Website Security Plugin)
Wordfence आपकी वेबसाइट को malware, brute force attacks और Hacking से बचाती है।
Key Features:
Setup Process:
- Wordfence ko install karein aur activate kare.
- Setup wizard ko follow karke basic security settings configure kare.
B. UpdraftPlus (Backup Plugin)
Website का रेगुलर backup लेना बहुत जरूरी होता है अगर साइड hack हो जाए या crash हो जाए आपके पास backup का option होना जरूरी है UpdraftPlus सबसे पॉपुलर backup plugin है।
Key Features:
Setup Process:
- UpdraftPlus install karein aur activate karein.
- Settings > UpdraftPlus Backups me jayein aur storage location (Google Drive, Dropbox) select karein.
- Backup schedule set karein aur “Backup Now” par click karein.
6. Essential Extra Plugins
|
Plugin Name |
Purpose |
|---|---|
|
LiteSpeed Cache |
Free caching plugin |
|
Sucuri Security |
Extra security aur malware scanner. |
|
Smush |
Image optimization aur compression. |
|
Contact Form 7 |
Simple contact forms banane ka tool. |
|
Akismet |
Spam comments ko block karta hai. |
|
WooCommerce |
E-commerce website ke liye plugin |
Read more Article
Conclusion:
Essential plugins आपकी WordPress साइट को ज्यादा functional secure और फास्ट बनाना है Elementor से वेबसाइट डिजाइन करना आसान होता है Rank Math या Yoast SEO से आपकी साइट गूगल में रैंक करती है और WP Rocket साइट स्पीड optimize करता है साथ ही Wordfence और UpdraftPlus जैसे Plugin आपकी साइट को सैफ और बैकअप रेडी रखते हैं ।
Website ka Basic Design Aur Layout Kaise Banaye?
एक अच्छी website का डिजाइन और layout ही उसका पहला impression होता है WordPress में Elementor और Gutenberg जैसे tools का use करके आप बिना किसी coding के अपनी website का layout डिजाइन कर सकते हैं यहां हम homepage, about page, aur contact page ka डिजाइन का step-by-step process बताएंग।
1. Elementor aur Gutenberg ka Upyog
Elementor (Drag-and-Drop Page Builder)
Elementor एक पावरफुल पेज बिल्डर है जो drag-and-drop के जरिए visually वेबसाइट डिजाइन करने की सुविधा देता है यह बिगनर के लिए परफेक्ट है क्योंकि इसमें फ्री डिजाइन टेंप्लेट अवेलेबल है।
Elementor ke Faayde:
Elementor Install Karne ka Tarika:
- Dashboard > Plugins > Add New me jayein.
- “Elementor” search karein aur install kare.
- Activate karke Pages > Add New par click karein aur “Edit with Elementor” ka option select kare.
Gutenberg (Default WordPress Block Editor)
Gutenberg WordPress का डिफॉल्ट block edito है जो आपको Block Basic Layout बनाने का ऑप्शन देता है हर ब्लॉक अलग section यह एलिमेंट को रिप्रेजेंट करता है (जैसे Image, text, button)।
Gutenberg ka Upyog:
- Pages > Add New me jayein.
- Gutenberg editor me text, images aur buttons ko blocks ke zariye add kare.
2. Homepage Design
Homepage आपकी वेबसाइट का सबसे इंपॉर्टेंट पेज होता है क्योंकि यह पहला पेज होता है जो लोग देखते हैं इस पेज का लेआउट क्लीन और attractive होना चाहिए।
Elementor ke Zariye Homepage Design:
- Page Create Kare:
- Pages > Add New par click karein aur “Edit with Elementor” ka option choose kare.
- Pre-designed Template Import Kare:
- Elementor me Templates Library me jayein aur ek homepage template import kare.
- Custom Section Add Kare:
- Hero Section: Ek attractive heading aur call-to-action button add kare.
- Services Section: Grid ya column me apne services ya features dikhayein.
- Testimonials: Client reviews aur feedback ke liye ek section banaye.
- Contact Form: Footer me contact form aur address add kare.
- Responsive Layout Test Kare:
- Mobile aur tablet view me site ko check kare aur responsive design ensure kare
3. About Page Design
About page पर आप अपने business या वेबसाइट के बारे में बताएं जहां पर आपकी वेबसाइट का परपज और आपके बैकग्राउंड की जानकारी होती है।
About Page Design with Gutenberg:
- Page Add Kare:
- Pages > Add New me jaye aur “About Us” page banaye.
- Text aur Image Blocks Add Kare:
- Heading aur paragraph blocks ka upyog karke apne business ka description likhe. ek homepage template import kare.
- Image block ka use karke apni team ya office ki tasveer lagaye
- Team Section:
- Ek column layout me team members ka introduction aur unka photo add kare.
- Mission aur Vision Section:
- Aapke business ka goal aur values explain kare.
4. Contact Page Design
Contact Page पर यूजर को आप तक पहुंचने का रास्ता दिया जाता है इस पेज पर कॉन्टैक्ट contact form, phone number aur location map जरूर होना चाहिए।
Elementor ke Zariye Contact Page Design:
- Contact Form Plugin Install Kare:
- Contact Form 7 ya WPForms plugin install kare.
- New Page Create Kare:
- Pages > Add New me jayein aur “Contact Us” page banaye.
- Form Add Kare:
- Elementor ke zariye contact form block drag karein aur apna form embed kare
- Google Map Embed Kare:
- Elementor ka “Google Maps” widget drag karke apni location ka map embed kare.
- Social Media Links Add Kare:
- Footer me social media icons add karein taki log aapke social pages tak bhi pahuch sake.
5. Footer aur Header Design
Header Design:
- Elementor Pro se custom header design kare jisme logo, navigation menu aur call-to-action buttons ho.
Footer Design:
- Footer me important links (Privacy Policy, About, Contact) aur newsletter subscription ka section add kare.
Best Practices:
- Responsive Design: Har page ka mobile aur tablet layout test kare.
- Call-to-Action (CTA): Har page par clear CTA add kare (jaise: Contact kare, Buy Now, Subscribe).
- Minimalistic Design: Clean aur simple layout rakhe taki website fast aur user-friendly lage.
- Consistency: Sabhi pages ka color scheme aur typography similar rakhe.
Conclusion:
Elementor और Gutenberg का उपयोग करके आप बिना किसी टेक्निकल नॉलेज के एक professional aur SEO-friendly वेबसाइट डिजाइन कर सकते हैं अपना Home Page, About Page और Contact Page अच्छे से डिजाइन करें आपकी ऑनलाइन presence को स्ट्रांग बनाने के लिए।
SEO Optimization for WordPress Website
एक वेबसाइट के लिए SEO (Search Engine Optimization) बहुत जरूरी है क्योंकि यह Google और दूसरे Search Engine में rank करने में मदद करता है wordpress website के लिए SEO करना आसान होता है क्योंकि यहां से काफी SEO Plugin और tools अवेलेबल है इस section में हम basic on-page SEO setup aur SEO plugin के use करने का पूरा प्रोसेस समझेंगे।
1. Basic On-Page SEO Setup
On-page SEO का मतलब है वेबसाइट के हर पेज को optimize करना ताकि वह search engines में बेटर rank करें इसमें title tags, meta descriptions, keywords और images ऑप्टिमाइज जैसे चीज शामिल होती है।
A. Focus Keyword Research:
- Google Keyword Planner, Ubersuggest ya Ahrefs jaise tools ka upyog kare aur apni website ke liye sahi focus keywords choose kare.
- Low competition aur high search volume wale keywords pe dhyan de.
- LSI (Latent Semantic Indexing) keywords ka bhi istemal kare. Jaise agar aapka focus keyword “Create WordPress Website” hai to LSI keywords ho sakte hain:
B. Title Tag aur Meta Description Likhe:
- Har page ka title tag unique aur keyword optimized hona chahiye (60 characters ke andar).
- Meta description 150-160 characters ka likhe aur usme bhi focus keyword shamil kare.
- Jaise:
Title: WordPress Website Kaise Banaye – Step by Step Guide
Meta Description: Apni khud ki WordPress website banane ka pura tarika seekhein. Ye guide beginners ke liye best hai jo WordPress par apni site create karna chahte hain.
C. URL Structure (Permalink):
- URL ko simple aur clean rakhein. Example:
www.yoursite.com/create-wordpress-website - URL me focus keyword shamil kare.
D. Headings ka Sahi Upyog:
- H1 tag sirf page ka main title hona chahiye.
- H2 aur H3 tags ka upyog subheadings ke liye karein.
- Example:
- H1: WordPress Website Kaise Banaye
- H2: WordPress Installation ka Tarika
- H3: CPanel se Install Karein
E. Image Optimization:
- Har image ke alt text me focus keyword shamil karein.
- Image ka size compress karein taki website ki speed achhi rahe. Smush ya TinyPNG plugin ka upyog kare.
2. Advanced SEO Tips:
- Internal Linking:
- Har post me do se teen internal links add kare taki users aapke dusre articles bhi padhe aur bounce rate kam ho.
- External Linking:
- High authority websites se link kare (jaise: Wikipedia ya niche ke popular blogs).
- Content-Length aur Quality:
- Long-form content likhein (1500+ words) jo value provide kare.
- Keywords ko naturally use kare, keyword stuffing se bache
- Mobile Optimization:
- Responsive design ka upyog kare aur apni website ko mobile-friendly banaye.
- Page Speed Optimization:
- WP Rocket aur LiteSpeed Cache jaise plugins ka use karke website ki speed improve kare.
- Schema Markup:
- Schema markup ka use karke aapki website search results me zyada attractive dikhayi deti hai (jaise FAQ snippets).
- Google Search Console aur Analytics:
- Apni website ko Google Search Console aur Google Analytics se connect karein aur performance track kare.
Website Ko Live Karna Aur Test Karna
Website को live करना एक इंर्पोटेंट स्टेप है जो आपकी hard work को दुनिया के सामने लाता है लेकिन launch से पहले कुछ जरूरी टेस्ट और चेक लिस्ट को follow करना होता है ताकि वेबसाइट स्मूथली कम करें और यूजर के लिए seamless experience दे।
1. Website Launch Checklist
A. Domain aur Hosting Setup:
- Domain Name aur Hosting properly connect hai ya nahi.
- DNS settings sahi se propagate hui hai ya nahi (jo 24-48 ghante lag sakte hain).
- SSL Certificate install aur activate hai.
B. WordPress Configuration:
- Permalinks ka sahi structure set karein (Settings > Permalinks > Post Name).
- Website ke title aur tagline check karein (Settings > General).
- Time Zone, Date aur Language sahi set hai (Settings > General).
C. Essential Pages Check:
- Homepage, About Us, Contact Us aur Privacy Policy pages live aur working hai.
- 404 error page aur custom maintenance page set hai.
- Navigation Menu properly set hai aur sabhi links sahi se work kar rahe hain.
D. SEO Settings:
- SEO Plugin (Rank Math/Yoast) ka setup complete hai.
- Har page ka Title Tag aur Meta Description sahi hai aur focus keyword include hai.
- XML Sitemap generate karke Google Search Console me submit kiya gaya hai.
E. Security aur Backup:
- Security Plugin (Wordfence/All in One WP Security) install aur activate hai.
- Backup plugin jaise UpdraftPlus se regular backup schedule set hai.
- Login URL ko customize karke extra security add ki gayi hai.
2. Speed aur Mobile Friendliness Test.
A. Website Speed Test:
Website की speed user experience और SEO दोनों के लिए जरूरी है Slow Website का bounce rate ज्यादा होता है और Google भी fast-loading साइट को पसंद करता है।
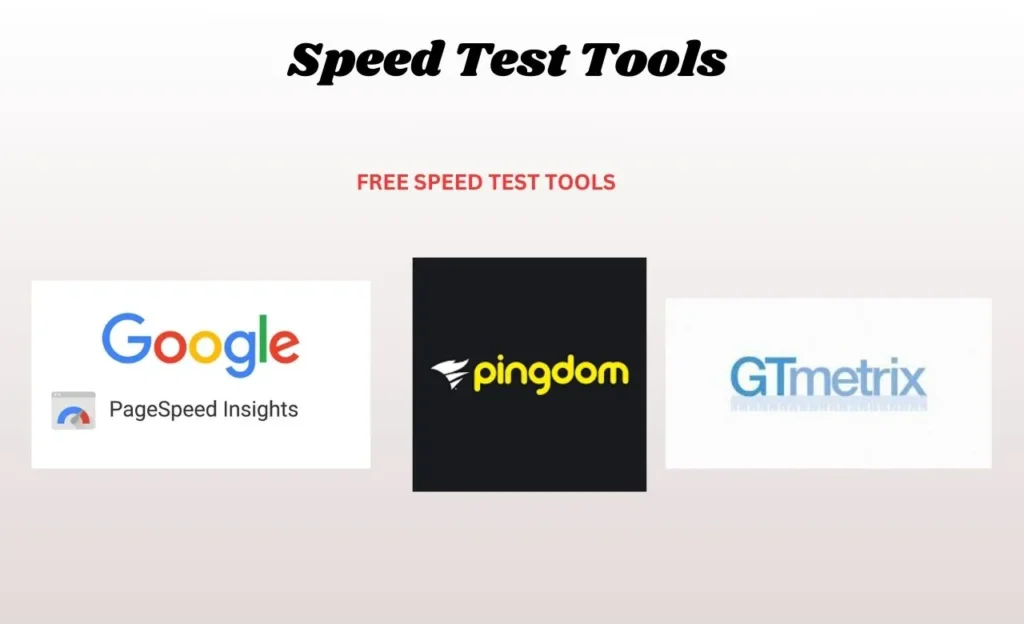
Speed Test Tools:
Optimization Tips:
- Caching Plugin (WP Rocket, LiteSpeed Cache) install kare.
- Images Optimize kare (Smush ya TinyPNG ka upyog karke).
- Unnecessary CSS aur JavaScript ko minify kare.
- Content Delivery Network (CDN) jaise Cloudflare ka upyog karein.
B. Mobile Friendliness Test:
मोबाइल यूजर के लिए वेबसाइट रेस्पॉन्सिव और फास्ट होनी चाहिए ।
Mobile-Friendly Test Tools:
- Google Mobile-Friendly Test
- Responsive Design Checker
Optimization Tips:
- Responsive Theme ka upyog kare jo mobile aur tablet par sahi se dikhai de.
- Text aur Buttons ko bada aur readable rakhe.
- Pop-ups aur Interstitials ko minimum rakhe.
- Mobile par forms aur buttons easily clickable hone chahiye.
3. Testing Aur Final Checks:
- Email Notifications aur Contact Forms sahi se kam kar rahe hain ya nahi.
- Broken Links ko check karein (Broken Link Checker plugin ka upyog kare).
- Social Media Sharing Buttons test karein aur ensure kare ki sahi se kaam karte hain.
- Har page ka proofreading kare taki koi grammatical error na ho.
4. Google Tools Integration:
- Google Analytics integrate karke traffic aur user behavior track kare.
- Google Search Console se website ko index karein aur performance monitor kare.
- Google Tag Manager ka upyog karke tracking aur scripts manage kare.
WordPress Maintenance Tips
आपकी WordPress website को smoothly चलाने के लिए रेगुलर maintenance जरूरी है maintenance से वेबसाइट की security, speed aur performance बनी रहती है इस क्षेत्र में हम website backup, updates aur security measures के बारे में डिटेल समझेंगे।
1. Website Backup Kaise Kare?
A. Backup Plugins ka Upyog:
- UpdraftPlus (Free aur Pro Version Available):
- WordPress ke sabse popular backup plugins me se ek hai.
- Automated backups aur one-click restore ka option milta hai.
- Google Drive, Dropbox aur Amazon S3 jaise cloud services pe backup save kar sakte hain.
- Setup:
- Plugins > Add New me jaye aur “UpdraftPlus” install kare.
- Activate karke Settings > UpdraftPlus Backups me jaye.
- Backup schedule set kare (daily/weekly) aur storage location choose kare.
- “Backup Now” par click karke turant manual backup bhi le sakte hain.
- Jetpack Backup:
- Real-time backup aur malware protection ke saath aata hai.
- Premium plugin hai lekin beginners ke liye secure option hai.
- BackupBuddy (Paid Plugin):
- Puri website ka backup lene aur migration karne ke liye use hota hai.
- Malware scan aur scheduled backup ka option milta hai.
read more Article
2. Updates aur Security Measures
A. WordPress Updates Kaise Kare:
- Manual Update:
- Dashboard me Updates section par jayein aur sabhi plugins aur themes ko manually update kare
- Automatic Updates:
- Settings > General > Automatic Updates enable kare taki WordPress core updates automatically install ho jaye.
- Plugins aur themes ke liye bhi auto-update ka option available hai.
- Maintenance Mode Use Karein:
- Jab aap updates ya changes kar rahe ho to maintenance mode activate karein taki visitors ko ek temporary message dikhayi de.
- SeedProd aur WP Maintenance Mode plugins ka upyog kare.
B. Security Measures:
- Security Plugins Install Kare:
- Wordfence Security:
- Real-time firewall aur malware scan karta hai.
- iThemes Security:
- Brute force attacks se bachaata hai aur site ko secure rakhta hai.
- Sucuri Security:
- Malware cleanup aur DDoS protection provide karta hai.
- Wordfence Security:
- Login Security:
- Limit Login Attempts:
- Bahut zyada login attempts hone par users ko temporarily block karne ka option deta hai.
- Two-Factor Authentication (2FA):
- Google Authenticator ya Authy ka upyog karke login ke liye extra layer of security lagaye.
- Limit Login Attempts:
- SSL Certificate Install Karein:
- SSL (Secure Sockets Layer) se website “https://” pe chalti hai jo secure hota hai.
- Hosting provider ke through free SSL install kare (Let’s Encrypt).
- File Permissions aur Monitoring:
- File Manager ya FTP se file permissions set kare.
- WP Activity Log plugin ka upyog karke site pe hone wali activities monitor kare.
3. Malware Scan aur Regular Monitoring.
- Malware Scanning Tools:
- MalCare: Real-time scanning aur malware removal tool.
- SecuPress: Security vulnerabilities ko detect karke automatic fix karta hai.
- Regular Monitoring:
- Website uptime aur downtime monitor karne ke liye UptimeRobot ya Jetpack ka use kare.
4. Database Optimization:
- WP-Optimize plugin ka upyog karke database ko clean karein taki website ki speed aur performance acchi bani rahe.
- Post revisions aur spam comments delete karein jo unnecessary database load banate hain.
FAQs (Frequently Asked Questions)
-
Kya WordPress Website Banana Free Hai?
WordPress website बनाना फ्री है अगर आप wordpress.com का फ्री प्लान use करते हैं तो अगर आप wordpressed.org use करें तो उसमें आपको Domin, Hosting लेना पड़ेगा।
-
WordPress Site Ko Monetize Kaise Kare?
WordPress साइट को monetization के लिए आप Google AdSense, affiliate marketing, online courses, services, ya e-commerce store setup कर सकते हैं।
-
Kitna Time Lagta Hai WordPress Site Banane Me?
अगर आप beginner हे तो basic WordPress site में 3-5 घंटे लगते हैं अगर आपको complex साइड बनानी है तो 2-7 दिन भी लगा सकते हैं।
Conclusion
WordPress एक powerful और flexible platform है जो beginners से लेकर professionals तक सभी को अपनी वेबसाइट बनाने और मैनेज करने का आसान तारिक देता है इस गाइड में दिए गए स्टेप को फॉलो करके आप अपनी wordpress website successful Create कर सकते हैं ।
Customized कर सकते हैं और Optimize कर सकते हैं WordPress की बेस्ट ecosystem में अवेलेबल theme ,plugins और टूल से आप अपनी साइट को फुल Functionality और user-friendly बना सकते हैं जो आपके audience को इंगेज करेंगे।